Did you know that the average solar panel installation increases home energy efficiency by up to 85%? With statistics like that, it’s no wonder you’re considering joining the legions of homeowners harnessing the power of the sun.
As you stand on the brink of making a sustainable choice, you’ll need to navigate the intricacies of installation—a process that’s both technical and rewarding. You’ve got the motivation, now let’s arm you with the knowledge to transform your rooftop into a powerhouse.
From assessing the perfect spot that’ll catch the golden rays to flicking the switch on your very own green grid, mastering the art of solar panel installation is a journey you’ll want to embark on. And while the task may seem daunting, don’t worry; you won’t have to go at it alone.
Stay tuned as we shed light on the essential steps to ensure your solar panels glint in the sun, and work efficiently for years to come.
Listen To The Summary
Key Takeaways
- Assess property suitability based on sun orientation and shade analysis
- Gather necessary tools such as a cordless drill, drill bits, ladder, safety gear, and measuring tools
- Mount solar panels securely and align them for maximum sun exposure
- Wire and set up the electrical components properly, complying with local codes and regulations
Assessing Installation Site
Before you harness the sun’s power for your home, it’s crucial to evaluate the potential of your property as a suitable candidate for solar panel installation. The sun’s orientation and your home’s position play pivotal roles in how much solar energy you can collect. You’ll want to ensure that your solar panels will face the direction that receives the most sunlight throughout the day – typically, this means a south-facing orientation in the northern hemisphere.
Conducting a shade analysis is equally important. You don’t want your panels to be installed where shadows from trees, buildings, or other structures could significantly reduce their efficiency. Seasonal changes can affect shading as well, so it’s important to consider the position of the sun at different times of the year.
Examine your roof’s condition and its ability to support the weight of the solar panels. If your roof isn’t suitable, don’t worry – ground-mounted systems can be an excellent alternative. Remember, the goal is to have a clear, unobstructed path for sunlight to reach your solar panels. Achieving this will maximize your system’s performance and ensure you get the best return on your investment in solar technology.
Gathering Necessary Tools
Having assessed your property for solar panel suitability, it’s time to gather the essential tools you’ll need for a smooth installation process. You’ll want to be prepared with the right equipment to ensure efficiency and safety, particularly when it comes to drill selection and ladder safety.

When choosing a drill, ensure it’s up to the task. You’re looking for something powerful, yet controllable. Ladder safety can’t be overstated either; a reliable ladder and proper usage are paramount. Here’s a list of tools you’ll need:
- Cordless Drill: Select a model with variable speed control for precise drilling.
- Drill Bits: Specifically, get bits suitable for metal roofing if that’s your installation surface.
- Ladder: Invest in one that’s sturdy and the right height for your roof.
- Safety Gear: Don’t skimp on this, think gloves, safety glasses, and a harness if you’re working high up.
Aside from these, you’ll also need a tape measure, a stud finder, and perhaps a few friends to lend a hand.
Mounting the Solar Panels
Once you’ve got your tools ready, it’s time to focus on securely mounting the solar panels to your roof, ensuring they’re aligned for maximum sun exposure. Panel orientation is crucial; your panels should face true south in the Northern Hemisphere and true north in the Southern Hemisphere. This maximizes the amount of sunlight they can capture throughout the day.
Begin by mapping out where each panel will go. Keep in mind that the sun’s path changes with the seasons, so consider this when determining the best position for your panels. Once you’ve decided on the layout, it’s time to install the mounting hardware. You’ll need to drill into your rafters to secure the mounts firmly; this is where roof reinforcement might be necessary. If your roof isn’t strong enough to support the weight of the panels, you’ll need to reinforce it before proceeding.
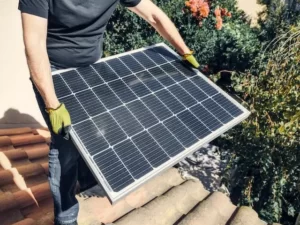
After the mounts are in place, you’ll attach the solar panels. Make sure to tighten all connections to withstand the elements, but don’t overtighten, as this can cause damage. With the panels securely mounted, you’re one step closer to harnessing the power of the sun!
Wiring and Electrical Setup
With your solar panels securely in place, it’s time to delve into the wiring and electrical setup that’ll bring your renewable energy system to life. This stage is crucial as it involves connecting your panel array to your home’s power system. You’ll need to ensure that everything is safely and correctly installed to avoid any electrical mishaps.
Firstly, panel orientation is key to maximizing energy absorption. Once you’ve got this down, you’re ready to tackle the wiring. Here’s what you need to focus on:
- Connecting the Panels: Use weatherproof cables to link your panels in series or parallel, depending on your voltage requirements.
- Inverter Selection: Choose a suitable inverter that matches your system’s output. It’ll convert the DC electricity generated by your panels into AC for home use.
- Safety First: Install a disconnect switch and make sure your system is grounded to protect against power surges.
- Compliance: Ensure all electrical connections comply with local codes and regulations, which might require an inspection.
Remember that while the physical wiring might seem straightforward, the technicalities can be complex. If you’re not experienced with electrical systems, it’s wise to hire a professional to ensure your setup is efficient, safe, and up to code.
Final Inspection and Testing
Before powering up your new solar energy system, it’s critical to conduct a thorough final inspection and perform comprehensive testing to ensure everything is functioning correctly. After all, you’ve invested time and effort, not to mention the permit acquisition process that’s been navigated to get to this point.
Start by visually inspecting all components. Check for secure mounting of panels, proper wiring connections, and ensure that inverters and other equipment are correctly installed. This is also the time to verify that your system adheres to local codes and regulations, which were likely a part of your permit acquisition.
Next, you’ll want to test the system’s electrical components using a multimeter to confirm that voltage and current readings align with your energy calculations. These figures are crucial—they tell you whether your system is capable of producing the power you expect. Discrepancies could indicate issues with panel performance or potential wiring problems.
After the electrical testing, it’s time to switch on the system—but keep a close eye on the initial readings. Monitor the inverter’s display to make sure that energy production matches your calculations. If everything checks out, congratulations! You’re now harnessing the sun’s power with sparkling solar panels.
Frequently Asked Questions
What Are the Long-Term Maintenance Requirements for Keeping Solar Panels Operating Efficiently?
To keep your solar panels humming, you’ll need to check their durability and clean them regularly. A consistent cleaning frequency ensures they perform efficiently, avoiding dirt build-up that can lower their energy output.
How Do Solar Panel Installations Impact Home Insurance Policies and Premiums?
You’ll need to check with your insurer, as solar panel installations can affect your home insurance policy and premiums. Look out for policy changes and solar incentives that might influence the cost.
Can Solar Panels Be Installed on Properties With Limited or Partial Sun Exposure, and What Are the Performance Implications?
You can install solar panels on partially shaded properties, but it’s crucial to conduct a shade analysis for efficiency optimization. Expect lower performance where sunlight is limited, impacting your energy output.
What Are the Environmental Considerations and Potential Negative Impacts of Solar Panel Manufacturing and Disposal?
You should know that manufacturing solar panels can lead to resource depletion and toxic waste. It’s crucial to consider these environmental impacts when thinking about solar as a green energy solution.
How Do Local Wildlife and Environmental Factors, Such as Bird Populations or High Winds, Affect the Decision to Install Solar Panels and Their Subsequent Maintenance?
You’ve got to consider local wildlife when installing solar panels. Bird activity may require nesting deterrents, and you’ll need a plan for panel shading due to high winds affecting nearby trees.
Conclusion
Now you’re all set to harness the sun’s energy! With the panels mounted and wiring in check, you’ve taken a big step towards energy independence. Give yourself a pat on the back for a job well done.
Remember, the final inspection and testing are crucial to ensure everything’s running smoothly. Embrace the clean, green power at your fingertips, and enjoy the fruits of your labour with a lower electric bill and a brighter, more sustainable future.


